Indoor air quality is something many homeowners overlook—until health issues begin to arise. Whether it’s allergies, respiratory problems, or mysterious odors, poor indoor air quality can be a hidden culprit. That’s where a home air testing service becomes essential. This guide walks you through everything you can expect from scheduling your first air test to receiving and understanding the results.
Let’s dive into the process step by step so you can breathe easier—literally and figuratively.
Why Indoor Air Quality Matters
Before we explore what happens during a home air testing service, let’s understand why it’s important. Most people spend over 90% of their time indoors, yet indoor air can be 2 to 5 times more polluted than outdoor air. Dust, mold, carbon monoxide, radon, volatile organic compounds (VOCs), pet dander, and even formaldehyde can all exist within your walls without you knowing it.
Poor air quality can lead to:
-
Chronic allergies
-
Headaches or dizziness
-
Sleep disturbances
-
Asthma attacks
-
Fatigue
-
Long-term respiratory illness
A proper testing service can help detect these pollutants early so you can take action before symptoms worsen.
Step 1: Initial Consultation and Scheduling
The process usually begins with a phone call or online booking. During the consultation, a specialist will ask about:
-
Symptoms you or your family are experiencing
-
Age of your home
-
Any known mold, smoke, or odor issues
-
HVAC system details
-
Presence of pets, recent renovations, or chemical use
Based on this information, the technician may recommend a basic or advanced package for testing. Once you agree, a date and time for an on-site visit is set.
Step 2: Pre-Visit Preparation
Before the technician arrives, you may be asked to do the following:
-
Avoid cleaning or vacuuming for 24 hours
-
Don’t open windows or doors more than necessary
-
Turn off air purifiers
-
Avoid using candles, sprays, or cooking strong-smelling food
These steps help ensure accurate test results by keeping the air as natural as possible.
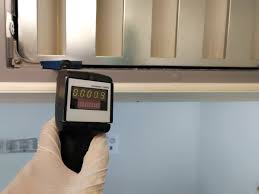
Step 3: On-Site Inspection and Equipment Setup
When the professional arrives, they’ll conduct a thorough inspection of your home. This often includes:
Visual Assessment
-
Checking for water damage or visible mold
-
Inspecting air vents, ducts, and HVAC systems
-
Looking for signs of poor ventilation
-
Observing pet areas and high-traffic rooms
Equipment Placement
Depending on the test type, the specialist may set up the following tools:
-
Air sampling pumps to collect airborne pollutants
-
Surface swabs to test for mold or bacteria
-
Humidity and temperature sensors
-
Carbon monoxide detectors
-
Radon monitors for long-term placement
They may take samples from various rooms, including attics, basements, and crawlspaces.
Step 4: Types of Tests Performed
A typical home air testing service can include one or more of the following tests, depending on your needs:
1. Mold Testing
Airborne mold spores are collected and compared against outdoor samples. Surface swabs or tape lifts may be used for visible growth.
2. VOC Testing
Volatile Organic Compounds like benzene or formaldehyde can be emitted from paint, cleaning products, or furniture. Air sampling devices analyze these chemical levels.
3. Allergen Detection
Dust mite residue, pet dander, pollen, and cockroach droppings can all affect allergies. Specialized filters help detect these particles.
4. Carbon Monoxide and Radon Testing
These odorless gases are deadly in high concentrations. Radon tests usually require devices to be placed in your home for 48–96 hours.
5. Particulate Matter (PM2.5/PM10)
Tiny particles suspended in the air from smoke, dirt, or pollen can aggravate respiratory problems. Air monitors can detect their levels in real-time.
Step 5: Lab Analysis
Once the samples are collected, they are either processed on-site (for basic tests) or sent to certified laboratories. The lab examines them under controlled conditions and produces a detailed report.
This process can take anywhere from 2 to 10 business days, depending on the complexity of the analysis.
Step 6: Report and Results
When your results are ready, you will receive a report via email or in person. The report typically includes:
-
Summary of findings
-
Concentration levels of each pollutant
-
Comparison to industry standards (e.g., EPA or WHO guidelines)
-
High-risk zones in your home
-
Visual graphs and color-coded data for easy understanding
Your technician will schedule a consultation to walk you through the results and explain any red flags.
Step 7: Recommended Solutions
If the test reveals problems, your air quality expert may suggest:
-
Air purifiers or HVAC filters
-
Dehumidifiers to control moisture
-
Mold remediation services
-
Ventilation upgrades
-
Use of low-VOC paints and household products
-
Professional cleaning for ducts and carpets
In severe cases (such as high radon levels), mitigation systems may need to be installed immediately.
Step 8: Follow-Up and Monitoring
Some companies offer follow-up visits to verify improvements after changes are made. If you install radon or air purifying systems, periodic testing may be advised every 6–12 months to ensure continued safety.
If you have vulnerable individuals at home—such as infants, elderly people, or asthma sufferers—routine air testing becomes even more important.
How Much Does a Home Air Testing Service Cost?
Prices vary based on your home size, number of rooms tested, and types of pollutants screened. Here’s a rough estimate:
| Type of Test | Estimated Cost (USD) |
|---|---|
| Basic Mold Test | $150 – $300 |
| VOC Testing | $200 – $500 |
| Radon Testing | $100 – $250 |
| Full Air Quality Panel | $400 – $1000+ |
It may seem like an investment, but when compared to medical bills or long-term health damage, it’s worth every dollar.
Final Thoughts
A professional home air testing service gives you more than just peace of mind—it provides data-driven insight into your home’s living conditions. From detection to solutions, this step-by-step process ensures your home remains a safe haven, free of invisible threats.
If you or your loved ones suffer from unexplained symptoms, chronic respiratory issues, or suspect hidden pollutants in your home, don’t wait. Schedule a home air testing service today and take the first step toward cleaner, healthier living.
FAQs
1. How long does a home air testing service take?
Most inspections and sample collections take 1–2 hours, but lab analysis may take several days.
2. Is air testing safe for pets and children?
Yes, the testing equipment is non-invasive and does not release any chemicals.
3. Can I do air quality testing myself?
DIY kits are available but often lack the precision and reliability of professional services.
4. How often should I get my home’s air tested?
At least once every 1–2 years or after major renovations, flooding, or new construction nearby.