If you’re a proud owner of a 2012 Ford Fiesta, you know how essential it is to keep your vehicle running smoothly. The radiator fan is one key component that often goes unnoticed but plays a crucial role in engine cooling. When your radiator fan fails, it can lead to overheating and severe engine damage. Whether you want to save on repair costs or enjoy getting hands-on with car maintenance, we’ve got you covered. Get ready to roll up your sleeves and dive into our easy-to-follow guide for replacing the radiator fan in your 2012 Ford Fiesta Radiator Fan. Your ride deserves nothing less than optimal performance!
Tools and Materials Needed
Before you start the replacement process, gather all the necessary tools and materials. Having everything ready will make your job smoother and more efficient.
First, you’ll need a socket set with various sizes to remove bolts easily. A ratchet wrench is essential for getting into tight spaces while minimizing effort. You might also want a torque wrench to ensure everything is adequately secured afterwards.
Next on your list should be pliers, particularly needle-nose ones, which are great for clips or connectors that may be difficult to reach. A flathead screwdriver can also be handy for prying off stubborn components.
Remember safety gear! Safety glasses protect your eyes from debris, while gloves keep your hands safe from sharp edges and hot parts during installation.
Grab a new radiator fan designed for the 2012 Ford Fiesta and other replacement parts like gaskets or electrical connectors. Keeping these tools and materials close at hand will help streamline the entire process, allowing you to focus on correctly installing that fan!
Safety Precautions
Working on your radiator fan requires caution. Before you begin, ensure the engine is completely cool. Hot components can cause burns, so give it ample time to cool down after driving.
Always wear protective gear such as gloves and safety glasses. This protects you from sharp edges and keeps debris away from your eyes while working under the hood.
Disconnecting the battery is a must. It eliminates any risk of electric shock or accidental short circuits while handling electrical components like the radiator fan.
If you’re lifting your vehicle for better access, secure it with jack stands. Relying solely on a hydraulic jack can be dangerous, as it may fail unexpectedly.
Keep an eye out for leaks or fluid spills in your workspace. These can create slippery surfaces that pose risks while you’re maneuvering around your vehicle. Following these precautions, you help ensure a safer DIY experience when replacing your radiator fan.
Preparing Your Vehicle: 2013 Ford Fiesta Radiator Fan
Before diving into the replacement process, preparing your vehicle correctly is essential. Start by ensuring that your 2013 Ford Fiesta Radiator Fan is parked on a level surface. This will make working underneath the hood much easier and safer.
Next, if you’ve been driving recently, let the engine cool down completely. Working with hot components can lead to burns or other injuries. A cold engine is safer and allows you to handle parts without discomfort.
Once cooled, open the hood and disconnect the battery terminals. Disconnecting these cables prevents electrical shorts while replacing the radiator fan. First, permanently remove the negative terminal for safety reasons.
Now that you’ve ensured safety check for fluid leaks around your car’s front area. If coolant or oil has seeped onto surfaces near where you’ll be working, clean them up before proceeding further.
Gather all necessary tools and materials in one convenient location by your vehicle. Having everything within reach will save you time and hassle as you complete this DIY maintenance project efficiently.
Removing the Old Radiator Fan
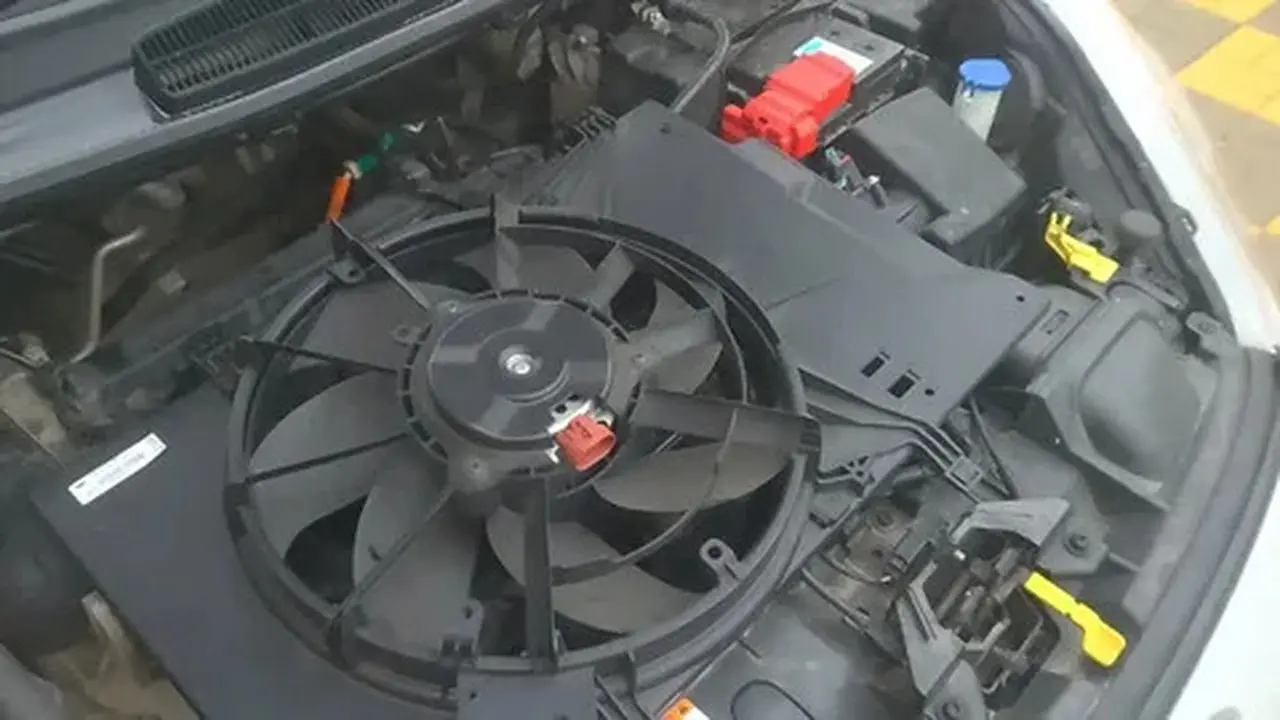
Before you remove the old radiator fan from your 2012 Ford Fiesta, ensure you’ve got everything prepared. Start by locating the fan assembly. It’s typically situated directly behind the radiator. Could you familiarize yourself with its layout?
Next, disconnect the battery to eliminate any risk of electrical shock while working on sensitive components. Remove any connectors or clips attached to the fan motor and keep them in a safe spot for later use.
Once disconnected, it’s time to remove the mounting bolts securing the fan assembly in place. Use a socket wrench for this task; it will make things much more straightforward than managing with hand tools alone. Set aside these bolts, as they’ll be necessary when installing your new unit.
With all bolts removed, carefully lift the radiator fan from its housing. Take care not to damage surrounding parts or wiring during this process; gentle movements are key.
Inspecting your old radiator fan before removal can provide insights into whether it functions correctly. Look closely at signs of wear or damage that could have led to its failure—this may save you trouble down the road!
Installing the New 2013 Ford Fiesta Fan
Once you have the new 2013 Ford Fiesta Fan ready, it’s time to install it in your 2012 Ford Fiesta. Begin by aligning the new fan with the mounting brackets. You want to ensure that all holes line up perfectly for a secure fit.
Seating the Fan
Firmly press down on the fan until it is seated correctly against the radiator core. This will help prevent vibrations while driving and maintain an efficient cooling system. Remember, proper alignment matters!
Securing with Bolts or Screws
Next, take your bolts or screws and insert them into their respective holes. Using a ratchet or screwdriver, tighten each firmly but avoid overtightening as this could damage the fan or surrounding components.
Reconnecting Electrical Connectors
After securing everything in place, reconnect any unplugged electrical connectors during removal. Ensure these connections are snug; loose wires can lead to operational issues.
Testing the New 2013 Ford Fiesta Cooling Fan
Once you’ve installed the new 2013 Ford Fiesta Cooling Fan, it’s time to put it to the test. Start by reconnecting the battery if you haven’t done so already. This will power up the electrical components necessary for testing.
Next, please turn on your vehicle and idle for a few minutes. Keep an eye on the temperature gauge; it should remain steady within normal operating ranges. If everything functions correctly, you’ll notice that the fan kicks in as the engine warms up.
Listen closely for any unusual noises from the fan area. A healthy radiator fan operates quietly without knocking or grinding sounds. Any strange noises could indicate improper installation or a defective part.
You can also monitor how quickly your engine cools once the fan activates. It should help lower temperatures effectively, especially during idling or slow-moving traffic conditions.
Take a short drive around your neighbourhood or nearby streets to observe performance at various speeds and loads. Pay attention to heating issues and noise levels while driving; this will ensure everything works correctly before taking longer trips.
Common Issues and Troubleshooting
When replacing the radiator fan, you may encounter a few common issues. One frequent problem is improper installation. Ensure all bolts and connectors are securely fastened to avoid rattles or disconnections while driving.
Another issue could be inadequate cooling performance. Check the wiring connections and fuses if your new fan isn’t activating as expected. A blown fuse can sometimes prevent the fan from functioning correctly, causing overheating during hot weather.
Listen for any unusual noises after installation. A grinding or whirring sound might indicate that something obstructs the fan blades or that the motor is failing. Inspect closely to rule out debris caught in its path.
If your dashboard temperature gauge still reads high even with a new radiator fan, consider other factors like coolant levels or thermostat failure. These components work together with your fan for optimal engine temperature management.
If everything seems fine but you’re not getting proper airflow through the grille, inspect for blockages, such as leaves or dirt buildup around the front of your vehicle. Keeping this area clear ensures maximum efficiency from your newly installed radiator fan.
Conclusion
Replacing the 2012 Ford Fiesta Radiator Fan can seem daunting, but it’s entirely manageable with the right tools and a bit of patience. Understanding each step empowers you to take control of your vehicle maintenance. Regular upkeep not only extends the life of your car but also enhances performance. A functional radiator fan is crucial for preventing overheating during those hot summer drives or climbing steep hills. Following these DIY tips will save you money on labour costs while gaining valuable knowledge about your vehicle’s inner workings. This hands-on experience will build confidence for future repairs.
FAQs
How do I know if my radiator fan is failing?
Look for signs of overheating or unusual noises when the engine is running. If the fan doesn’t turn on, it’s likely time for a replacement.
What tools will I need to replace my 2012 Ford Fiesta Radiator Fan?
A basic set includes wrenches, pliers, and screwdrivers. You’ll also need a new radiator fan compatible with your 2012 Ford Fiesta Radiator Fan.
Can I replace the radiator fan myself?
Yes! You can confidently tackle this DIY project with basic mechanical skills and these instructions.
| Related Business Listings |
| Contact Directory |
| Local Business Profiles |