Dual battery systems are essential for vehicles that require extra power for accessories such as winches, fridges, lighting, or high-powered audio systems. To maximize efficiency, reliability, and performance, many enthusiasts perform a big 3 upgrade wiring diagram dual battery system. This upgrade enhances the vehicle’s charging and grounding capabilities, ensuring both batteries remain charged and electrical loads are managed effectively.
While the concept may seem straightforward, improper installation of the big 3 upgrade wiring diagram dual battery system can lead to serious electrical problems, reduced performance, or even damage to components. This blog explores the most common mistakes made during installation and provides tips to ensure a safe and effective upgrade.
What Is a Big 3 Upgrade in a Dual Battery System?
Before discussing mistakes, it’s important to understand the purpose of the upgrade. The “Big 3” refers to three critical wires that are typically upgraded to larger-gauge wires to reduce resistance and improve electrical flow:
-
Alternator Positive to Battery Positive – Ensures more efficient charging of the main battery.
-
Battery Negative to Chassis Ground – Improves grounding for the primary battery.
-
Engine Block to Chassis Ground – Enhances the overall grounding loop for the engine and electrical system.
In a dual battery system, these upgrades are crucial because both batteries need reliable charging and grounding to function correctly under high loads. A big 3 upgrade wiring diagram dual battery system guides the proper routing and connection of these wires, ensuring optimal performance.
Common Mistakes in Big 3 Upgrade Wiring
1. Using Undersized Wire
One of the most frequent mistakes is using wires that are too small to handle the current. Stock wires are often insufficient when additional batteries or high-demand accessories are added.
Consequences:
-
Voltage drops under load
-
Reduced alternator efficiency
-
Dim lighting or underperforming accessories
-
Potential overheating of wires
Solution: Always use larger gauge wires (commonly 2 or 4 gauge) as recommended in the big 3 upgrade wiring diagram dual battery system. This ensures safe current flow and prevents excessive resistance.
2. Poor Ground Connections
Proper grounding is critical for electrical system stability. Inadequate grounding between batteries, engine, and chassis can lead to:
-
Erratic voltage readings
-
Difficulty starting the engine
-
Electrical noise in audio systems
Common mistakes include:
-
Failing to clean the contact points before connecting
-
Using a single thin wire instead of a dedicated heavy-gauge ground
-
Not connecting the engine block properly to the chassis
Solution: Follow the grounding instructions in your big 3 upgrade wiring diagram dual battery system, using dedicated, clean, and secure connections.
3. Improper Battery Isolation
In dual battery systems, it’s critical to isolate the starting battery from the auxiliary battery to prevent drain during engine off periods. Mistakes often include:
-
Connecting both batteries directly without a relay or isolator
-
Using the wrong type of isolator
-
Not following polarity guidelines
Consequences:
-
Main battery may drain when using accessories
-
Risk of overcharging or damaging the secondary battery
Solution: Use a proper battery isolator or smart relay as recommended in the big 3 upgrade wiring diagram dual battery system to manage charging and protect both batteries.
4. Incorrect Routing of Wires
Routing wires incorrectly can cause interference, shorts, or mechanical damage. Common routing mistakes include:
-
Running wires near hot engine components
-
Crossing wires with moving parts like steering shafts or belts
-
Failing to secure wires properly with clamps or cable ties
Solution: Use the routing guidance provided in the big 3 upgrade wiring diagram dual battery system, ensuring wires are protected from heat, friction, and vibration.
5. Skipping Fuses and Protection
Many DIY installers forget to include fuses or circuit breakers in the upgraded wiring. Fuses are critical for safety.
Consequences of skipping fuses:
-
Electrical fires during short circuits
-
Damage to batteries, alternators, or accessories
Solution: Install appropriate fuses or circuit breakers near each battery and along the main power lines, following the specifications in the big 3 upgrade wiring diagram dual battery system.
6. Poor Quality Terminals and Connectors
Using cheap or incompatible terminals and connectors can compromise the integrity of the wiring.
Consequences:
-
Loose connections leading to voltage drops
-
Increased resistance causing heat buildup
-
Premature failure of wiring
Solution: Always use high-quality, automotive-grade terminals and connectors, crimped or soldered correctly, as recommended in the big 3 upgrade wiring diagram dual battery system.
7. Ignoring Wire Length and Voltage Drop
Long wires increase resistance and reduce efficiency. A common mistake is cutting wires too short or using unnecessarily long wires without accounting for voltage drop.
Consequences:
-
Reduced charging efficiency
-
Accessories underperforming
-
Alternator strain
Solution: Measure carefully, cut wires to proper lengths, and follow gauge recommendations in the big 3 upgrade wiring diagram dual battery system to maintain voltage and efficiency.
8. Overlooking Alternator Capacity
Upgrading the wiring alone is not always enough. Some installers overlook whether the alternator can handle the additional load from a dual battery system and high-power accessories.
Consequences:
-
Alternator overheating
-
Poor battery charging
-
Shortened alternator lifespan
Solution: Evaluate your alternator’s output and consider upgrading to a high-output alternator if your system’s power demand exceeds the stock alternator capacity. The big 3 upgrade wiring diagram dual battery system assumes adequate alternator output for optimal performance.
9. Neglecting Regular Maintenance
Even after a proper installation, neglecting maintenance can cause issues:
-
Corrosion at terminals
-
Loose connections
-
Frayed or damaged wires
Solution: Inspect the wiring, connections, and battery health periodically. Maintenance ensures the benefits of the big 3 upgrade wiring diagram dual battery system are sustained over time.
10. Not Following Manufacturer Guidelines
Each vehicle may have unique wiring layouts, grounding points, and electrical specifications. A common mistake is copying generic guides without considering manufacturer-specific requirements.
Consequences:
-
Wiring may interfere with factory systems
-
Increased risk of short circuits or component damage
Solution: Always consult the vehicle manufacturer’s electrical diagrams in conjunction with the big 3 upgrade wiring diagram dual battery system to ensure compatibility and safety.
Tips for a Successful Big 3 Upgrade in Dual Battery Systems
-
Use the Right Tools: Wire strippers, crimpers, heat shrink, and torque wrenches ensure proper connections.
-
Label Wires: Labeling makes troubleshooting easier and reduces mistakes during installation.
-
Secure Connections: Use cable ties, clamps, and protective loom to prevent chafing or movement.
-
Test Before Finalizing: Measure voltage at each battery and verify charging efficiency before securing all components.
-
Seek Professional Help if Needed: For complex dual battery setups, professional installation ensures safety and optimal performance.
Conclusion
A big 3 upgrade wiring diagram dual battery system is a highly effective way to enhance your vehicle’s electrical performance, improve battery charging, and support high-demand accessories. However, improper installation can negate these benefits and create safety hazards.
Common mistakes include using undersized wires, poor grounding, skipping fuses, improper wire routing, neglecting alternator capacity, and ignoring manufacturer guidelines. By carefully following a proper wiring diagram, using high-quality components, and maintaining the system, you can maximize the reliability and efficiency of your dual battery setup.
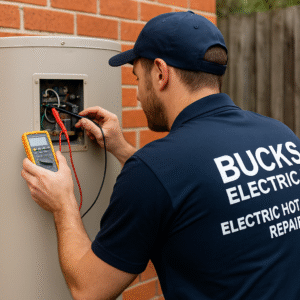
For expert guidance, professional installation, and ensuring your big 3 upgrade wiring diagram dual battery system is done safely and correctly, partnering with trusted technicians at Madison Electric Company guarantees your vehicle’s electrical system performs at its best while protecting your investment and ensuring long-term reliability.