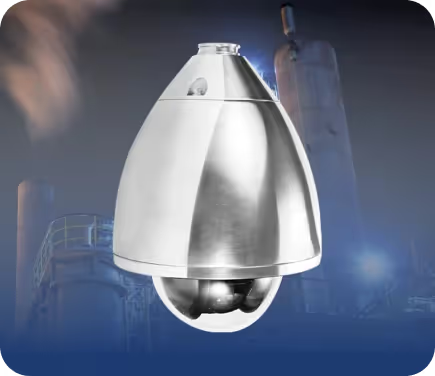
PTZ Dome cameras are an important part of security systems because they can move left, right, up, and down, and zoom in and out. This makes them perfect for watching large areas like parking lots, warehouses, or factories.
These cameras are very useful, especially in places where safety is a big concern. But to make sure they work well, it’s important to install them correctly. In this guide, we’ll explain how to install PTZ Dome cameras the right way to get the best results.
1. Choose the Right Place for the Camera
The first step is to choose a good location for your PTZ dome camera. The place you pick will decide how well the camera works. Here’s what to think about:
- Area to Watch: Position PTZ cameras to cover key areas like doors or busy spots.
- Height: Mount the camera 10-15 feet high for better coverage and security.
- Avoid Glare: Keep the camera away from direct sunlight or bright lights to prevent blurry footage.
2. Mount the Camera on a Strong Surface
Your camera needs to be mounted on a strong surface to avoid shaking or falling. A stable camera is important to make sure it moves smoothly.
- Solid Mounting Spot: Install the camera on strong surfaces like concrete or steel.
- Correct Position: Set up the camera to cover the desired area without obstruction.
- Weather Protection: Ensure the mount can withstand outdoor conditions.
3. Take Care of the Cables
Cabling is very important for PTZ cameras. If you don’t install the cables properly, the camera might not work right.
- Good Quality Cables: Use high-quality power and video cables for clear footage.
- Weatherproof Cables: Choose cables that resist rain or snow for outdoor cameras.
4. Ensure the Power Supply is Stable
PTZ dome cameras need a strong and stable power source to work properly.
- Check the Power Needs: Make sure the power supply matches the camera’s needs. PTZ cameras usually need more power than normal cameras.
- Use a Surge Protector: Install a surge protector to avoid power spikes that could damage the camera.
- Consider Backup Power: If the power goes out, your camera could stop working. Think about adding a backup power supply to keep it running.
5. Make Sure the Camera Connects Well
PTZ cameras usually send footage over a network connection. You need to make sure the camera can connect well and send video without problems.
- Wired vs. Wireless: If you’re using a wired camera, run Ethernet cables to the camera. If it’s wireless, make sure your Wi-Fi is strong enough to support the camera.
- Check Your Internet Speed: PTZ cameras use more internet data than regular cameras, so make sure your internet connection can handle it.
6. Test the Camera and Set It Up
After installing the camera, it’s important to test it to make sure it works correctly.
- Test the Movement: Make sure the camera can pan (move left and right), tilt (move up and down), and zoom in and out smoothly.
- Set Up the Features: Set up any special features like motion detection or recording schedules. Some cameras can be programmed to follow specific paths or zoom in on certain areas.
- Check the Video Quality: Look at the camera’s video feed to make sure the image is clear and sharp. Adjust the focus or settings if needed.
7. Regular Maintenance
To keep your PTZ camera working well, it’s important to take care of it over time.
- Clean the Camera Lens: Dust or dirt on the lens can affect the video quality, so clean it regularly.
- Check the Camera Periodically: Make sure the camera is still working correctly. Look for any loose parts or damage that could cause problems.
Conclusion
Installing a PTZ dome camera correctly is very important to ensure it works well and provides clear footage. By choosing the right location, using a strong mount, managing cables, and making sure everything is set up properly, you can get the best results from your camera.
If you want to improve the security of your area, make sure to follow these best practices for installing PTZ dome cameras.
