In today’s world, where cars are not just a mode of transport but also a significant investment, protecting their exterior is more crucial than ever. Paint Protection Film (PPF) is an innovative solution that helps safeguard your vehicle’s paint from scratches, chips, and environmental damage. This guide will cover everything you need to know about PPF, including installation, repair, and removal.
What is a Paint Protection Film?
Paint Protection Film is a clear, durable thermoplastic urethane film applied to the exterior surfaces of vehicles. It provides a shield against:
- Scratches
- Stone chips
- UV rays
- Chemical stains
With its self-healing properties, minor scratches and swirl marks can disappear over time, keeping your car looking new for longer.
Benefits of Using Paint Protection Film
- Durability: PPF can withstand the rigors of daily driving, including exposure to road debris, weather conditions, and UV rays.
- Enhanced Appearance: The film enhances the car’s shine and color depth, giving it a fresh, polished look.
- Resale Value: Protecting the original paint can maintain your car’s resale value, as potential buyers often prefer vehicles that have been well cared for.
- Easy Maintenance: PPF is easy to clean and requires no special care, making it a convenient option for busy car owners.
How to Install Paint Protection Film
Installing Paint Protection Film requires precision and attention to detail. Here’s a step-by-step guide to help you through the process:
Materials Needed
- Paint Protection Film
- Solution for application (water mixed with a few drops of dish soap)
- Spray bottle
- Squeegee
- Utility knife
- Microfiber cloth
Step-by-Step Installation
Step 1: Prepare the Surface
- Wash the Car: Start by washing your vehicle thoroughly to remove dirt, grime, and wax.
- Dry Completely: Use a microfiber cloth to ensure the surface is dry.
Step 2: Cut the Film
- Measure the Area: Use a measuring tape to determine the size of the area you want to cover.
- Cut the Film: Cut the Paint Protection Film to size, leaving an extra inch on all sides for adjustments.
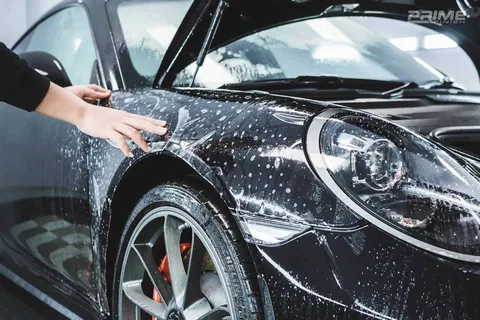
Step 3: Apply the Film
- Spray the Surface: Lightly mist the area where the film will be applied with the soapy solution.
- Peel and Position: Carefully peel the backing off the film and position it over the area.
- Smooth Out Bubbles: Use the squeegee to smooth out any bubbles or wrinkles, starting from the center and moving outward.
Step 4: Trim the Edges
- Cut Excess Film: Use a utility knife to trim any excess film, ensuring a neat finish.
- Finalize the Edges: Press down the edges firmly with the squeegee to secure the film.
Tips for a Successful Installation
- Work in a Dust-Free Environment: Minimize dust to avoid particles getting trapped under the film.
- Take Your Time: Don’t rush the process; precision is key for a flawless finish.
- Consider Professional Installation: If you’re unsure about doing it yourself, many companies offer Paint Protection Film in San Marcos, CA, where professionals can install it for you.
Repairing Paint Protection Film
Even with the best care, your Paint Protection Film may encounter issues. Here’s how to handle common problems:
Minor Scratches and Swirls
- Self-Healing Properties: Most high-quality films can self-heal from minor scratches when exposed to heat from the sun or a heat gun.
- Using Heat: Gently apply heat to the scratched area; this can help restore the film’s smooth surface.
Deep Scratches and Cuts
- DIY Patch Repair: If the damage is significant, you can cut a small piece of PPF and carefully apply it over the damaged area. Make sure the edges are sealed properly to prevent peeling.
- Professional Help: For extensive damage, consider seeking professional assistance. Many services specialize in repairing Paint Protection Film, ensuring a seamless look.
Removing Paint Protection Film
At some point, you may decide to remove the Paint Protection Film. Here’s a guide on how to do it safely:
Tools Needed
- Heat gun or hair dryer
- Plastic razor blade or spatula
- Adhesive remover
- Microfiber cloth
Step-by-Step Removal Process
Step 1: Heat the Film
- Apply Heat: Gently heat the film with a heat gun or hairdryer. This softens the adhesive, making it easier to peel off.
Step 2: Peel Off the Film
- Start at the Edge: Use a plastic razor blade to lift a corner of the film. Slowly peel it away from the surface.
- Keep It Even: Pull the film back at a low angle to minimize the risk of tearing.
Step 3: Remove Residual Adhesive
- Use Adhesive Remover: If there is any adhesive left on the surface, apply adhesive remover to a microfiber cloth and gently wipe it off.
Step 4: Clean the Surface
- Final Wash: Once all the film and adhesive are removed, wash the area to ensure it’s clean and ready for any new treatments or repairs.
Conclusion
Investing in Paint Protection Film is a wise decision for any car owner looking to protect their vehicle’s appearance and value. Whether you choose to install it yourself or seek professional help, understanding the benefits and maintenance of PPF will help you keep your car looking its best. If you’re in search of paint protection film near me, don’t hesitate to explore options available in your area. With proper care and attention, your vehicle can remain in pristine condition for years to come.